From Legacy Credentials to EUDI-Compliant Verifiable Credentials
From Legacy Credentials to EUDI-Compliant Verifiable Credentials
Introduction
Across the EU, many identity systems are already in production. They solve real user problems today, but they were built independently, expose different data models and protocols, and often come with different security and privacy properties. As a result, they are difficult to reuse in a consistent way across borders and across wallet ecosystems.
The EUDI ecosystem aims to change that by defining a common, interoperable model for digital identity and Verifiable Credentials. In practice, however, adoption does not start from a blank sheet. Organizations already operate legacy identity providers, registries, and credential systems, so a sensible onboarding strategy is to transform those existing credentials into EUDI-compliant ones instead of rebuilding everything from scratch.
In this blog post, we show one generic way to do that. Our approach uses the OpenID4VCI Authorization Code Flow [3] as a standards-based bridge between an existing identity system and a Credential Issuer. The resulting pattern is not specific to one national system or one provider. It is applicable whenever a legacy system can authenticate a user and provide trustworthy identity attributes that can be mapped into an EUDI credential.
To make that concrete, we then dive into a real-world example based on the integration between FortID technology and the Certilia identity provider (IDP) [1]. In this setup, the FortID Issuer service issues a Verifiable Credential (PID [2]) using the same generic pattern.
The Problem We Want to Solve
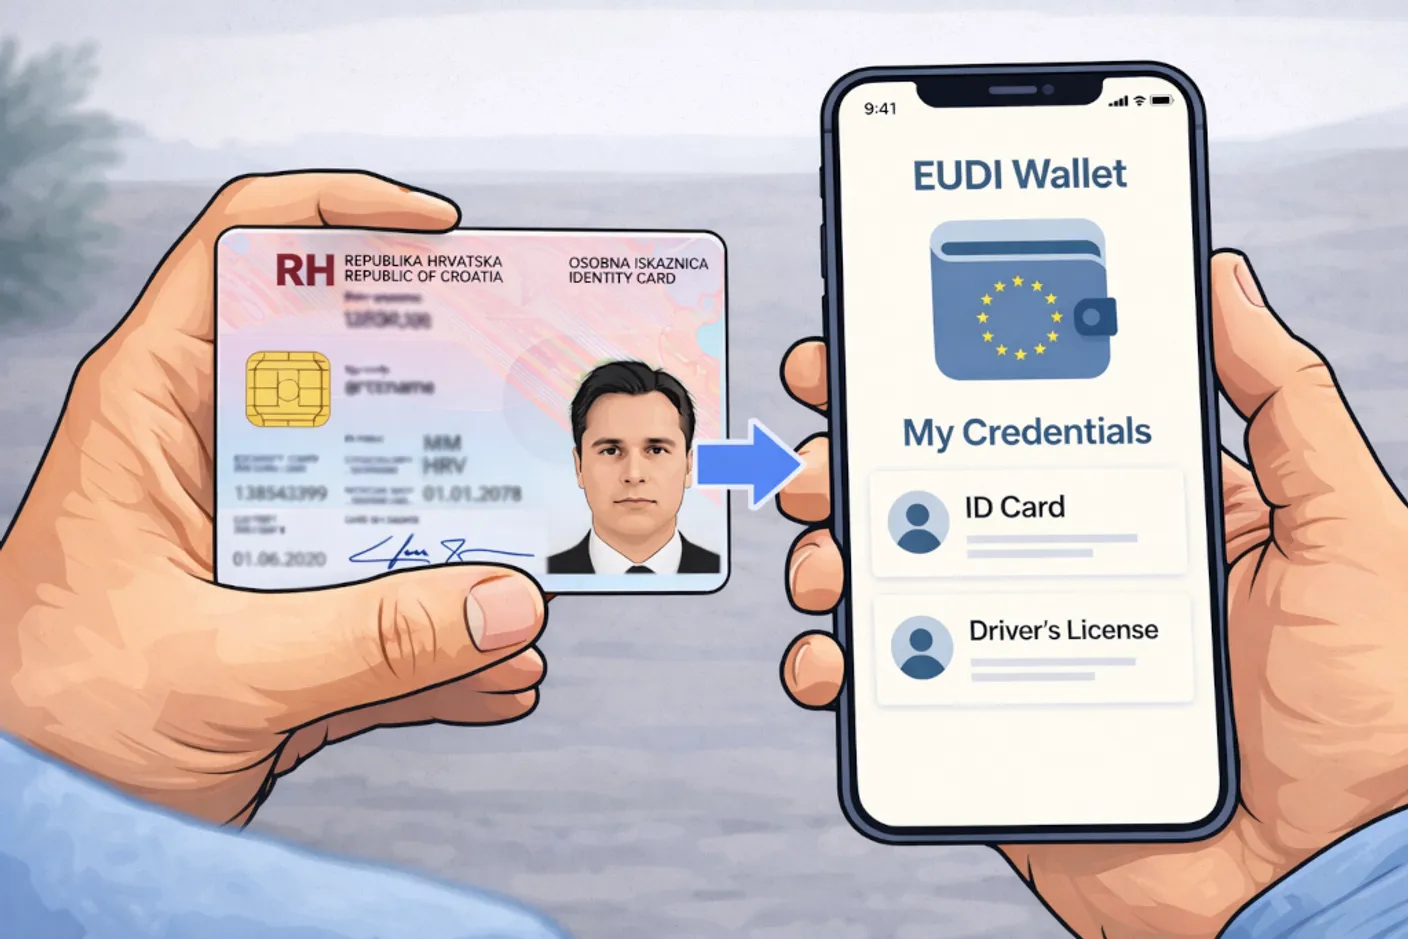
The general problem is straightforward: how do we take a credential that already exists in a production identity system and issue its EUDI-compliant equivalent in a wallet-friendly format?
In the EUDI Wallet ecosystem, Person Identification Data, or PID [2], is typically the first Verifiable Credential issued to a user. A practical migration path is therefore to use an existing national credential as the source of truth and transform it into an EUDI-compliant PID that can be stored in the wallet.
That pattern works for a class of systems with a few important properties:
- The user is already enrolled in an existing identity system.
- That system can authenticate the user with sufficient assurance.
- The system can expose the identity attributes needed for the target EUDI credential.
- Those attributes can be mapped into the target credential schema.
In our example, the legacy credential is a Croatian Personal ID, and the external system is Certilia [1]. The end user is already enrolled with Certilia and has an active account and mobile application.
Our Solution Pattern
Our solution is to place an OpenID4VCI Authorization Server between the wallet-facing Credential Issuer and the legacy identity system. The wallet still follows a standard OpenID4VCI Authorization Code Flow, while the Authorization Server delegates the user authentication to the external identity provider and translates the resulting attributes into claims the Issuer can use.
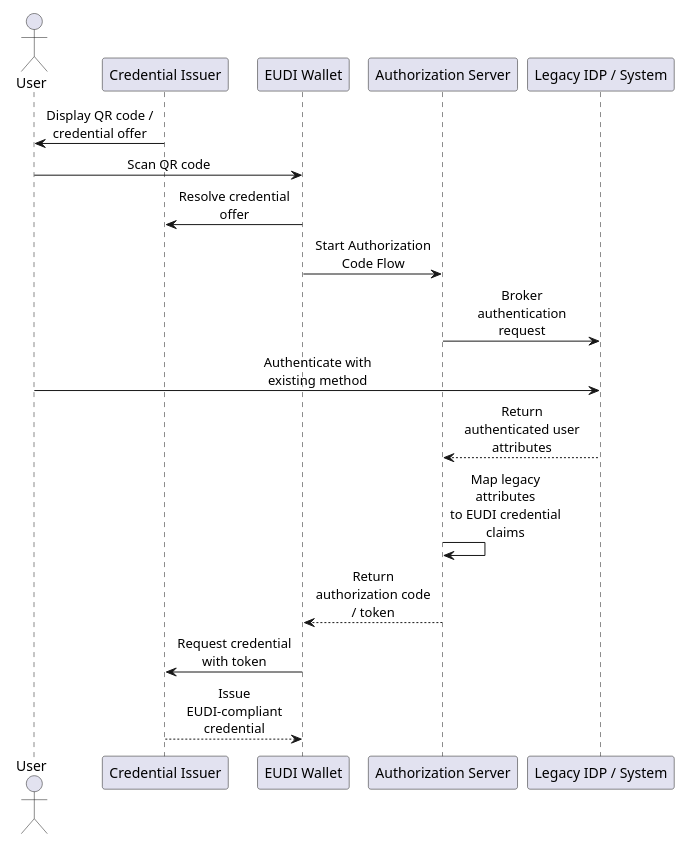
At a high level, the process consists of the following steps:
- The issuer initiates the issuance flow and generates a QR code.
- The Wallet scans a QR code.
- The Wallet redirects the user to the Authorization Server, which in turn brokers authentication to the external identity provider.
- The user authenticates in the legacy system using the mechanisms already deployed there.
- The Wallet receives an authorization token and requests the credential from the Issuer.
Architecture Overview
At this point, we have introduced the central reusable component: the Authorization Server. In this setup, there are actually two authorization layers involved:
- The OpenID4VCI Authorization Server, used for the OpenID4VCI Authorization Code Flow.
- The external Authorization Server or Identity Provider behind the legacy system, which is not under our control.
For the OpenID4VCI Authorization Server, which we will refer to simply as the Authorization Server from now on, we use Keycloak [4]. Keycloak must be configured to work both with the FortID Issuer and with the Certilia Identity Provider.
Why Keycloak
The Authorization Server plays a central role in this integration. It acts as the bridge between the EUDI Issuer, in our case the FortID Issuer, and the Certilia Identity Provider.
FortID already includes authorization support for the Pre-Authorized Code Flow [5]. For the Authorization Code Flow, however, we decided to rely on a third-party technology, Keycloak. The main reason is practical: Keycloak already provides mature OAuth 2.0 and OpenID Connect capabilities, which allows us to focus on the EUDI-specific parts of the solution instead of building an Authorization Server from scratch.
On the Keycloak side, we need to configure two things:
- The Credential Issuer integration, so the FortID Issuer can validate the token issued by Keycloak.
- The Certilia integration, so Keycloak can delegate user authentication to the external Identity Provider.
Deep Dive: Certilia Integration
The remaining sections show how this general pattern was implemented against a real production-facing system. We use Certilia as the external identity provider for Croatian credentials, Keycloak as the Authorization Server, and the FortID Issuer as the Credential Issuer.
Keycloak Configuration for FortID Issuance
To be compatible with the Credential Issuer, the Authorization Server must define the same scopes as the Credential Issuer. The Credential Issuer must also be able to validate the Authorization Server token.
The following section describes the JWT access token that the Authorization Server must issue in order to be accepted by the Credential Issuer.
JWT
Header
| Field | Description |
|---|---|
typ | Type of the token. Must be set to "at+jwt". |
alg | Signing algorithm used for the JWT. Must be "ES256". Currently, this is the only supported algorithm. |
kid | Key ID of the signing key used to produce the JWT signature. |
Body
| Claim | Description |
|---|---|
iss | URL of the Authorization Server |
sub | Subject that will consume the issued credential |
aud | Must match the Credential Issuer Identifier |
exp | Expiration time of the Access Token |
iat | Issuance time of the Access Token |
jti | Token identifier to prevent replay attacks |
client_id | Registered client identifier |
scope | Indicates which credential(s) can be issued |
issuer_state | Original issuer_state value provided by the Wallet |
Custom scripts on the Keycloak
In addition to the standard Identity Provider configuration, some custom Keycloak logic is required to handle the issuer_state parameter. This parameter is part of the OpenID4VCI flow used by the FortID Issuer, but it is not a standard OAuth 2.0 parameter. Because of that, Keycloak does not process it automatically.
To support this flow, custom scripts are used to preserve the issuer_state value during authentication and make it available later in the token issued to the Wallet.
Keycloak Configuration for Certilia
To configure Certilia as an external OpenID Connect Identity Provider in Keycloak, the main parameters that must be provided are:
clientIdandclientSecret- Redirect URI (Keycloak broker callback endpoint)
- Authorization URL
- Token URL
- JWKS URL
- Metadata Descriptor URL
- Logout URL
Keycloak also maps Certilia claims into internal user attributes, such as given name, family name, country, birthdate, document issuing country, document expiration date, and picture. These mapped attributes are later exposed as access token claims expected by the FortID Issuer.
The redirect URI that must be registered in the Certilia configuration is the Keycloak broker callback endpoint:
https://<your-keycloak-host>/realms/eudi/broker/<idp-alias>/endpointIf the Certilia Identity Provider is created in Keycloak with the alias certilia, the redirect URI becomes:
https://<your-keycloak-host>/realms/eudi/broker/certilia/endpointIt is important not to confuse this callback URI with the wallet redirect URI. The broker callback URI is used only between Certilia and Keycloak, while the wallet redirect URI is configured separately on the Keycloak client used by the Wallet.
End-to-End Example with the FortID Issuer Service
Create the issuer in the FortID Issuer Service
Before starting the Authorization Code flow, we first need to create an issuer in the FortID Issuer Service. This issuer represents the entity that will later expose the OpenID4VCI metadata and issue the final credential to the wallet.
All requests to the FortID Issuer control API are authenticated with an API key, which is sent in the X-API-KEY header.
A minimal request for creating the issuer looks as follows:
curl -X POST "https://eis.fortid.com/control/issuer" \
  -H "Content-Type: application/json" \
  -H "X-API-KEY: <your-api-key>" \
  -d '{
    "issuerId": "Croatia_PID",
    "issuerMetadata": {
      "display": [
        {
          "name": "FortID Issuer",
          "locale": "en-US",
          "background_color": "#12807c",
          "text_color": "#FFFFFF"
        }
      ]
    }
  }'
The most important field in this request is issuerId, which uniquely identifies the issuer inside the FortID Issuer Service. The optional issuerMetadata block defines display information that wallets can show to the end user during issuance.
After the issuer is created, the FortID Issuer Service generates the issuer identity and exposes the issuer metadata endpoint that will later be used by the wallet during the OpenID4VCI flow.
Assign the PID schema to the issuer
After the issuer has been created, the next step is to assign the PID schema and define how claims coming from Keycloak should be mapped into the final credential. This is done with the add-schema endpoint.
In our setup, Keycloak is the Authorization Server and Certilia is the external identity provider behind it. For that reason, the schema configuration must include both the Keycloak realm URL and the mapping instructions for the certilia login method.
curl -X POST "https://eis.fortid.com/control/issuer/Croatia_PID/add-schema" \
  -H "Content-Type: application/json" \
  -H "X-API-KEY: <your-api-key>" \
  -d '{
    "schemaId": "eu.europa.ec.eudi.pid_mdoc",
    "authorizationServer": "https://<your-keycloak-host>/realms/eudi",
    "instructions": {
      "https://<your-keycloak-host>/realms/eudi": {
        "certilia": {
          "given_name": ["eu.europa.ec.eudi.pid.1", "given_name"],
          "family_name": ["eu.europa.ec.eudi.pid.1", "family_name"],
          "birth_date": ["eu.europa.ec.eudi.pid.1", "birth_date"],
          "issuance_date": ["eu.europa.ec.eudi.pid.1", "issuance_date"],
          "expiry_date": ["eu.europa.ec.eudi.pid.1", "expiry_date"],
          "issuing_country": ["eu.europa.ec.eudi.pid.1", "issuing_country"],
          "issuing_authority": ["eu.europa.ec.eudi.pid.1", "issuing_authority"],
          "place_of_birth": ["eu.europa.ec.eudi.pid.1", "place_of_birth"],
          "picture": ["eu.europa.ec.eudi.pid.1", "portrait"],
          "nationality": ["eu.europa.ec.eudi.pid.1", "nationality"]
        }
      }
    }
  }'
The authorizationServer field identifies which Authorization Server is allowed to issue access tokens for this schema. The instructions block then defines how claims from the Keycloak access token are translated into PID claim paths expected by the FortID Issuer.
Note that eu.europa.ec.eudi.pid_mdoc is used as the credential configuration identifier on the Credential Issuer side and must also be included in the scope claim issued by Keycloak.
This mapping is the point where the Certilia user data becomes usable for EUDI issuance. For example, a token claim such as given_name is copied into the PID claim eu.europa.ec.eudi.pid.1.given_name, while picture is mapped to the portrait field in the final credential.
Initiate the issuance session
Once the issuer and schema are configured, the actual issuance session can be started. This step creates a new OpenID4VCI issuance session and returns the Credential Offer that will later be delivered to the wallet.
In the Authorization Code flow, the initiation request contains two important parts:
credentialData, which defines the credential configuration and any initial claim valuesprotocolConfig.grant_type.AuthorizationCode, which enables the Authorization Code flow and carries theissuer_state_payload
curl -X POST "https://eis.fortid.com/control/issuer/Croatia_PID/initiate" \
  -H "Content-Type: application/json" \
  -H "X-API-KEY: <your-api-key>" \
  -d '{
    "credentialData": {
      "credentialConfigurationId": "eu.europa.ec.eudi.pid_mdoc",
      "claims": {
        "eu.europa.ec.eudi.pid.1": {}
      }
    },
    "protocolConfig": {
      "grant_type": {
        "AuthorizationCode": {
          "issuer_state_payload": {
            "certilia": "skip"
          }
        }
      }
    }
  }'
The values inside credentialData.claims can be used as initial input for the issuance session, but they are overwritten by access token data when corresponding mappings are defined.
The issuer_state_payload field is specific to the Authorization Code flow used by the FortID Issuer. It is embedded into the issuer_state parameter, forwarded by the wallet to Keycloak during authorization, and later expected to reappear as the issuer_state claim in the access token returned by the Authorization Server.
Wallet state before issuance
Before the issuance flow starts, the wallet does not yet contain the PID credential. In our example, the document list is initially empty:

Once the issuance session has been created, the FortID Issuer returns a Credential Offer. In our example, this offer is presented to the user as a QR code, which is then scanned by the wallet:
The same Credential Offer can also be represented directly as text:
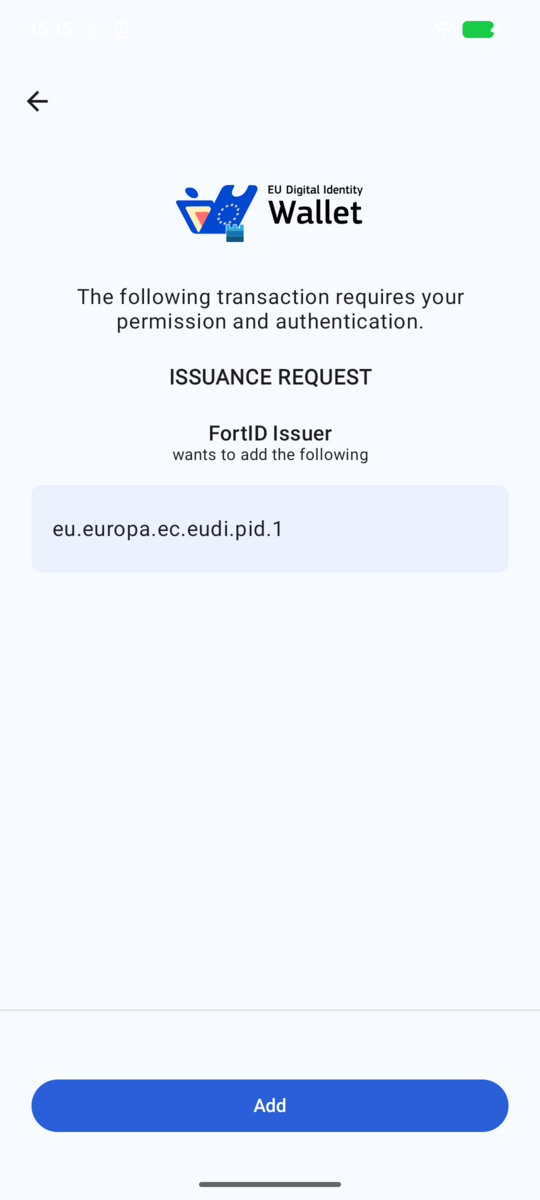
openid-credential-offer://?credential_offer_uri=https%3A%2F%2Fissuer.fortid.example.com%2Fprotocol%2Foid4vci%2Fissuer%2FCroatia_PID%2Fcredential-offer%2Fd064d753-6c38-4b35-888c-a8b0df1d0edcAfter the wallet resolves the Credential Offer, it displays the issuance request and asks the user to continue:
Authentication through Keycloak and Certilia
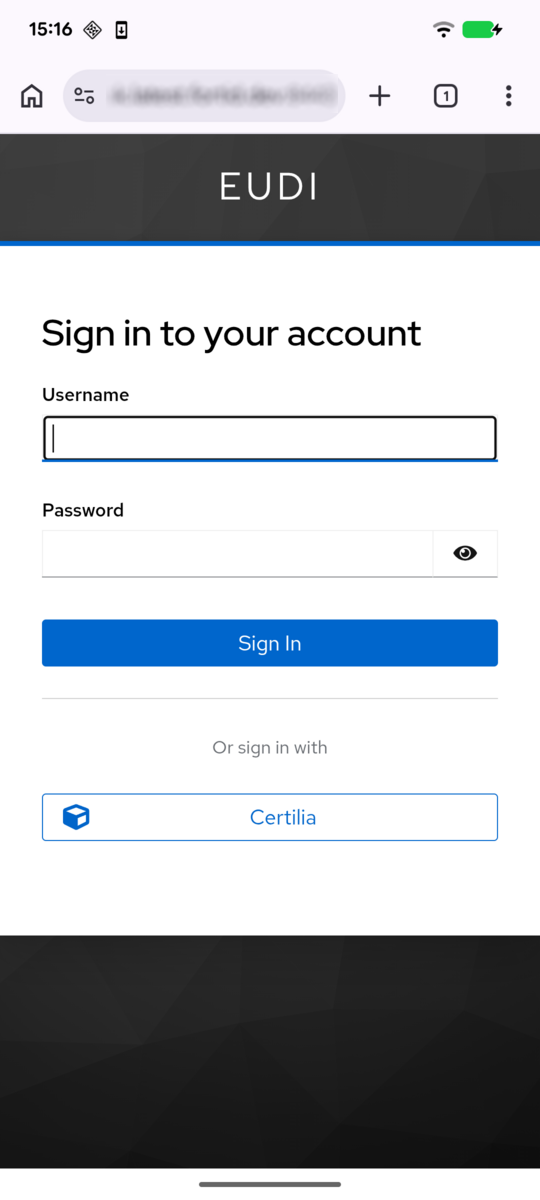
After the user accepts the issuance request, the wallet redirects the user into the Authorization Code flow handled by Keycloak. Keycloak presents the login screen with the Certilia identity provider:
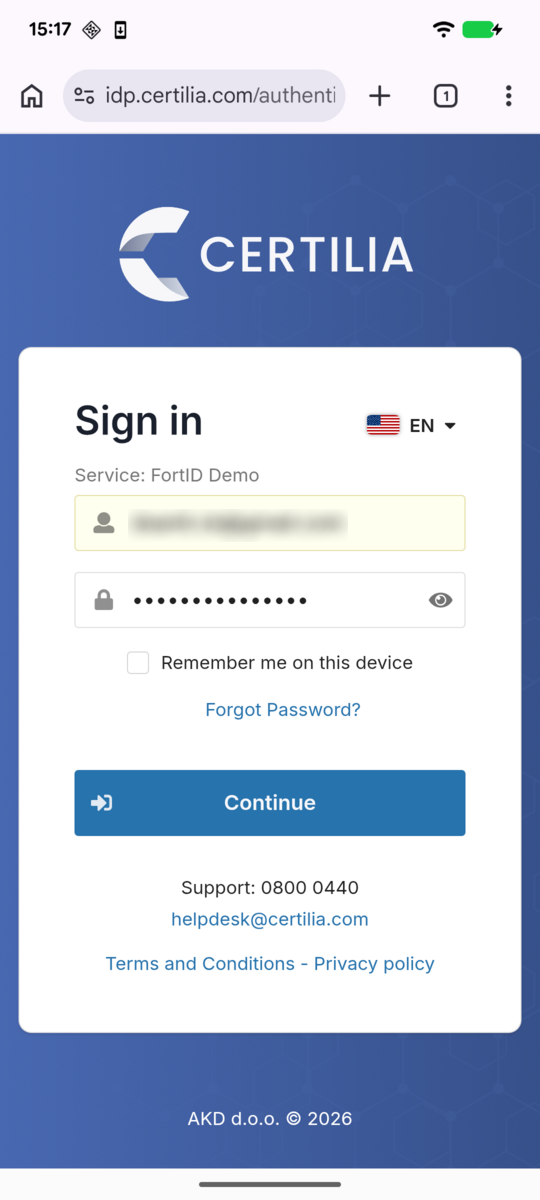
After selecting Certilia, the user is redirected to the external identity provider, where the primary authentication step is completed:
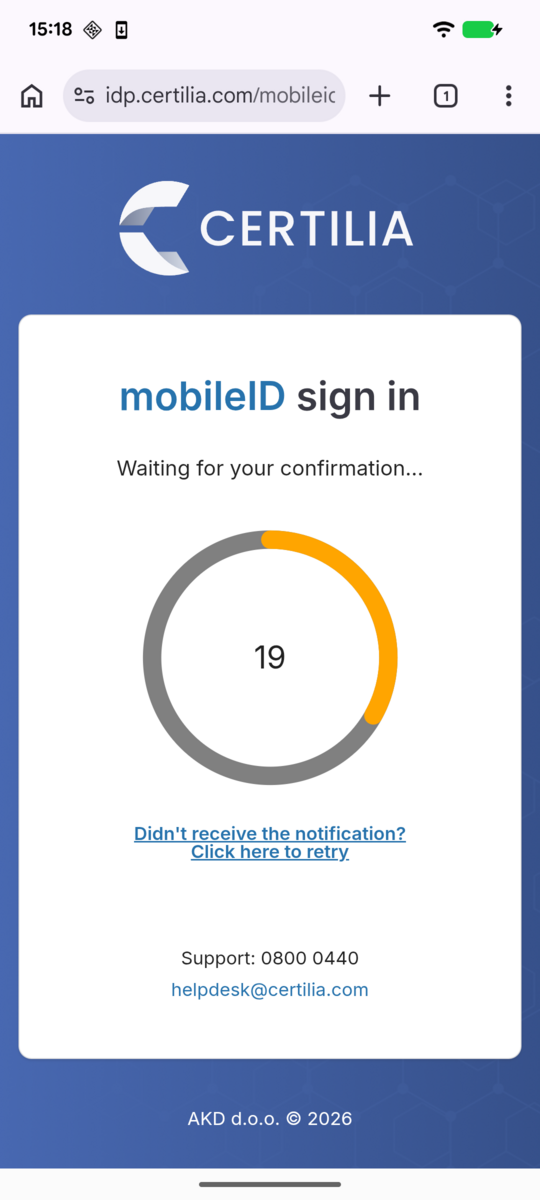
Certilia then performs the second-factor authentication step before returning control back to Keycloak and completing the brokered login:
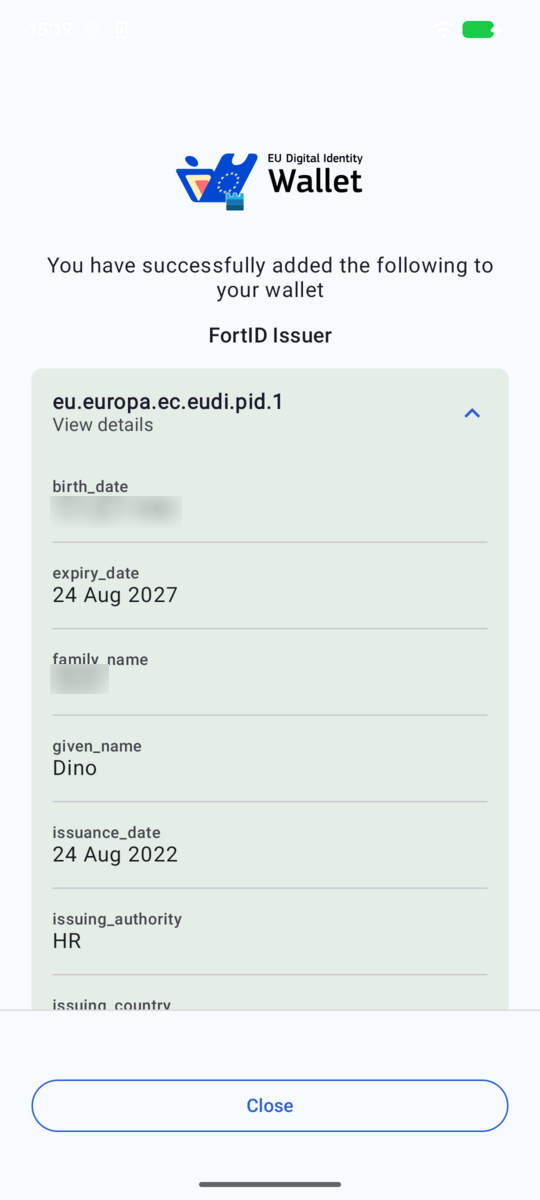
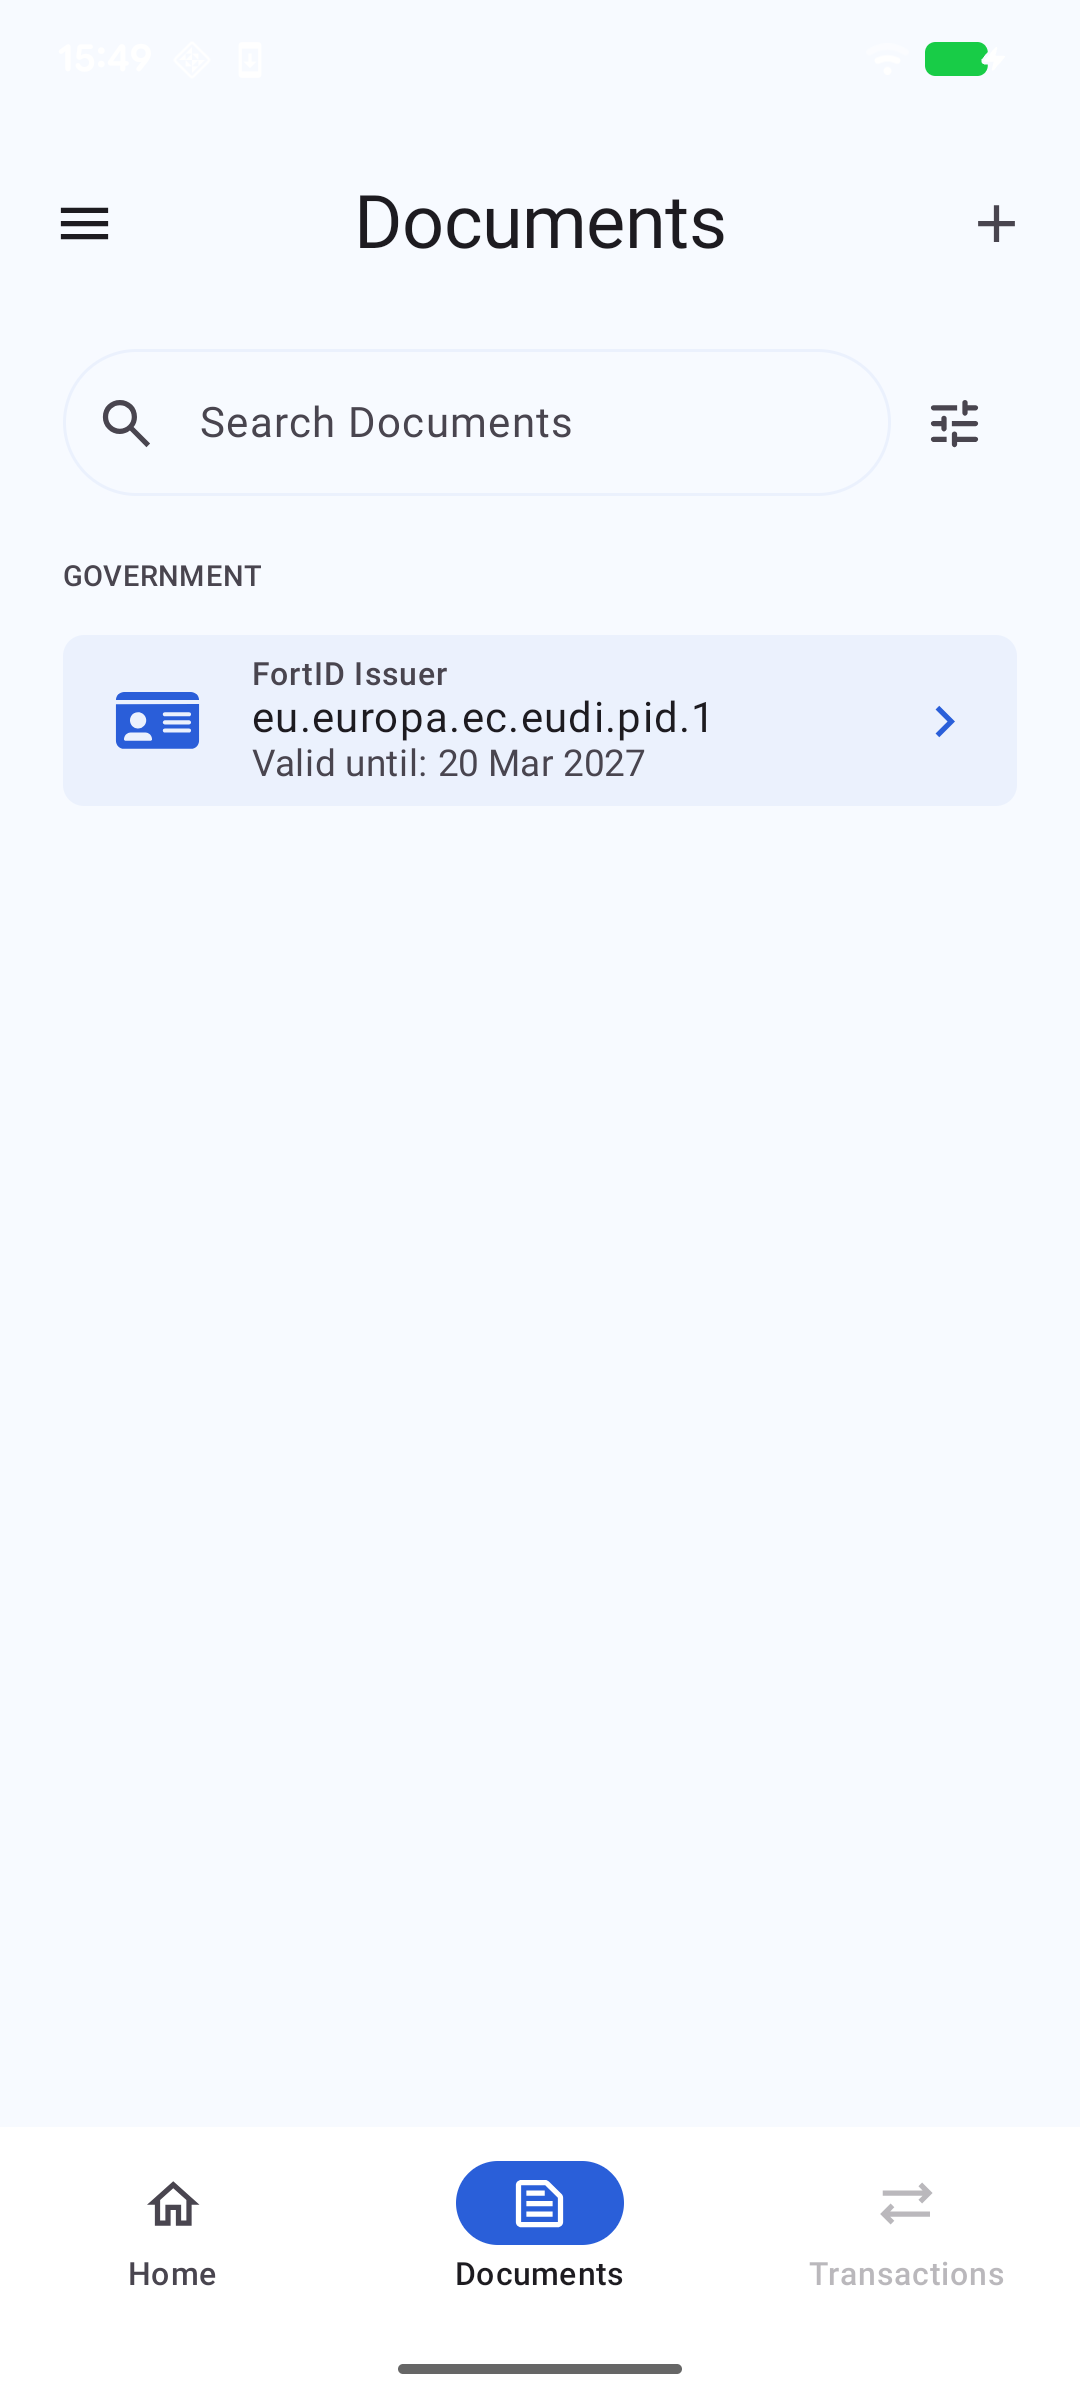
Credential issued to the wallet
After the authentication flow is completed and the wallet exchanges the authorization code for an access token, the FortID Issuer returns the PID credential. As a result, the newly issued credential appears in the wallet:
Returning to the wallet document list, we can now see that the newly issued credential is available for the user:
Regulatory Path for Reusing Existing Identity Systems
This integration pattern is now easier to position in the evolving EUDI regulatory framework. Commission Implementing Regulation (EU) 2026/798 [6], published in the Official Journal on 8 April 2026, defines a regulated remote onboarding path for the European Digital Identity Wallet based on an existing electronic identification means at assurance level substantial, combined with additional remote onboarding procedures so that the final result reaches assurance level high as defined in the eIDAS assurance framework [7].
That distinction is important. The regulation is not phrased as “issuing a new credential from a legacy one”, but it clearly supports the kind of migration strategy discussed in this article. A legacy or pre-existing identity system can be used as the trusted starting point, as long as the onboarding and verification process around it is designed so that the overall assurance level for the wallet onboarding reaches high.
Conclusion
This example shows that the OpenID4VCI Authorization Code Flow can be used as a generic bridge between legacy identity systems and EUDI-compliant credential issuance. By integrating an external identity provider with Keycloak and the FortID Issuer, existing authentication and identity infrastructure can be reused instead of being rebuilt from scratch.
The Certilia integration is the concrete proof point, not the limit of the approach. The same pattern can be applied in many scenarios where a legacy system can authenticate the user and provide trustworthy attributes for the target credential. That makes it a practical onboarding path into the EUDI ecosystem for organizations that already operate production identity systems and want to issue interoperable Verifiable Credentials with a lower integration barrier.